
Cool & Creamy Butterfinger Pie

A no-bake, crowd-pleasing pie with peanut butter, cream cheese, and lots of crushed Butterfinger bars — perfect for parties and simple desserts.
This no-bake Butterfinger pie has been a party favorite in my house for years. I first made it one summer when a last-minute potluck request meant I needed something fast, impressive, and transportable. The combination of silky cream cheese and peanut butter, sweet powdered sugar, and crunchy chopped Butterfinger candies creates a texture and flavor contrast that always disappears from the plate first. It’s rich without being heavy, and that crisp candy adds a nostalgic crunch that sparks childhood memories every single time.
I love this as an easy dessert to bring to gatherings: it stores well in a cooler, slices beautifully, and people often ask for the recipe before they finish their second slice. The filling is forgiving — you can make it a day ahead and the flavors actually deepen after a night in the refrigerator. If you like peanut butter and candy-bar flavors, this is one of those recipes that feels indulgent yet effortless. It’s also a great last-minute entertainer because it requires no oven time and minimal hands-on mixing.
Why You'll Love This Recipe
- Ready with just 15 minutes of hands-on prep — perfect for busy evenings or last-minute get-togethers.
- No baking required: simply mix, chill, and serve, which saves oven time and makes summer entertaining easy.
- Uses pantry staples and store-bought shortcuts (like a pre-made chocolate crust and Cool Whip) for speed without sacrificing flavor.
- Textural contrast from creamy filling and crunchy Butterfinger pieces keeps each bite interesting and crowd-pleasing.
- Make-ahead friendly: prepare a day ahead to let flavors meld; freezes well for up to 3 months when wrapped tightly.
- Customizable: swap crusts or candy bars to suit tastes or dietary needs.
My family’s reaction the first time I made this was instantaneous: quiet, happy chewing, then the inevitable chorus of “Can we have this again?” From backyard barbecues to holiday potlucks, this dessert has become a shorthand for comfort and celebration at our table.
Ingredients
- Cream cheese (8 ounces): Use full-fat cream cheese at room temperature for the smoothest, creamiest filling. Brand matters little, but Philadelphia gives reliably silky texture. Softening fully prevents lumps and reduces mixer time.
- Creamy peanut butter (1/2 cup): Choose a no-stir creamy peanut butter like Skippy or Jif for consistent sweetness and a stable emulsion. Natural peanut butter can be used but may make the filling slightly looser due to oil separation.
- Vanilla extract (2 teaspoons): Pure vanilla deepens flavor more than imitation; two teaspoons adds warmth without overt sweetness.
- Powdered sugar (1 1/2 cups): Also called confectioners' sugar; it stabilizes and sweetens the filling while keeping it light. Sift if lumpy.
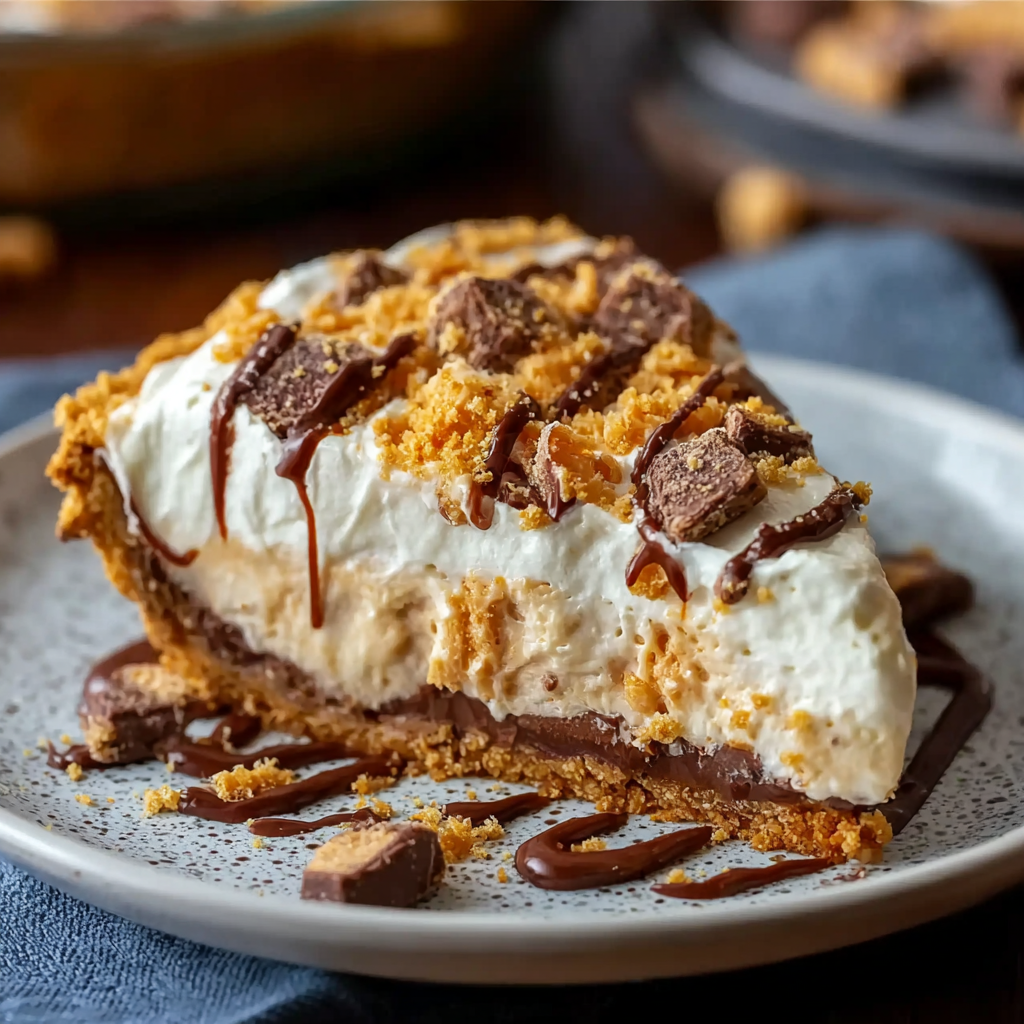
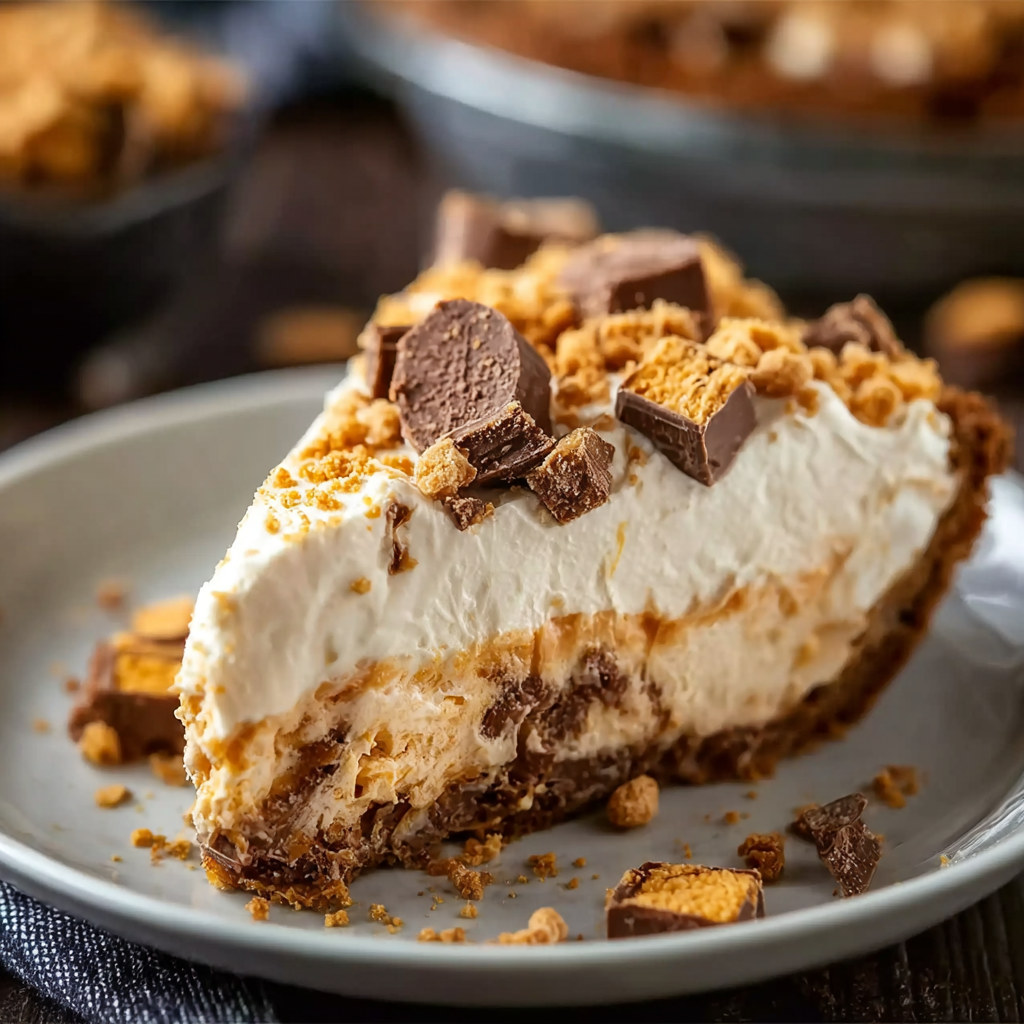
- Butterfinger bars (12.5-ounce bag, fun-sized): Crush nearly all the bars for folding into the filling; reserve 2 bars worth of pieces to scatter on top for crunch and presentation.
- Cool Whip (8-ounce container), thawed: Lightens the filling and gives that airy, mousse-like texture. For a denser pie use less Cool Whip; for lighter use more.
- Chocolate crust (store-bought): A 9-inch Oreo or chocolate graham cracker crust adds a chocolatey base that balances the peanut and candy sweetness. You can substitute a homemade crust if preferred.
Instructions
Step 1: Soften and combine the base ingredients Remove the cream cheese from the refrigerator at least 30 minutes before you start so it reaches room temperature; this ensures a lump-free texture. In a large bowl, beat the cream cheese with a handheld electric mixer on medium speed until smooth, about 1 to 2 minutes. Add the peanut butter and vanilla and continue beating until fully combined and glossy. The emulsion will look uniform with no streaks. Step 2: Sweeten and stabilize Sift or gradually add the powdered sugar while beating on low speed so it incorporates without dust clouds. Beat until the sugar is fully mixed and the texture is dense but spreadable — about 1 to 2 minutes. Taste and adjust: if you prefer slightly less sweetness, you can reduce powdered sugar by 2 tablespoons without compromising structure much. Step 3: Fold in crunchy candy and Cool Whip Fold in about three quarters of the crushed Butterfinger pieces using a rubber spatula so you keep some of the candy’s crisp texture. Gently fold in the thawed Cool Whip in two additions to retain volume; overmixing will deflate the filling and make it dense. Aim for a light, airy consistency that still holds its shape when spread. Step 4: Assemble and finish Spread the filling evenly into the prepared chocolate crust with an offset spatula or the back of a spoon. Sprinkle the reserved Butterfinger pieces on top for texture and visual appeal. Smooth the edges for a clean slice. Step 5: Chill thoroughly Refrigerate the assembled pie for at least 4 hours, preferably overnight, to set. Chilling allows the filling to firm up and the flavors to meld; slice with a warm, clean knife for tidy pieces.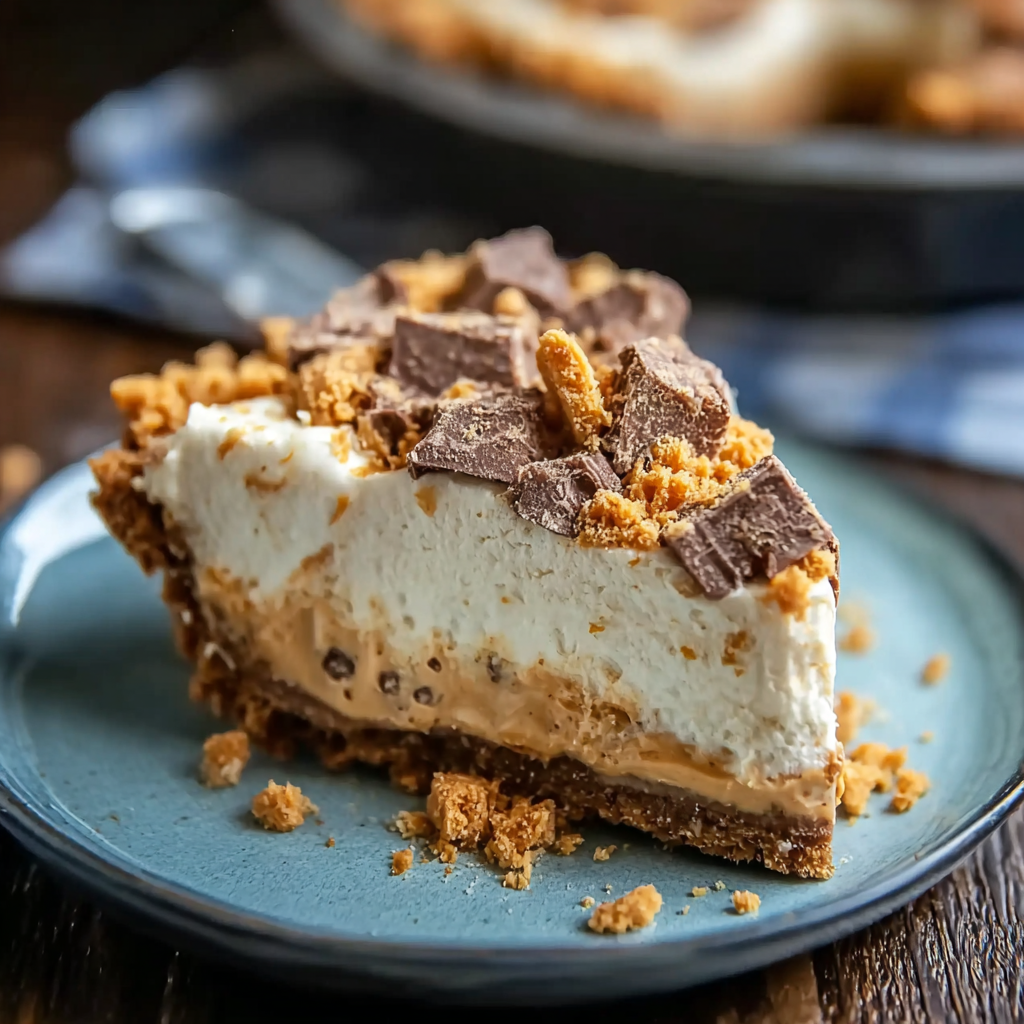
You Must Know
- This pie is rich: one slice has about 650–700 calories depending on the crust — serve smaller portions if needed.
- Refrigerate for at least 4 hours; the filling will be too soft to slice cleanly if served sooner.
- Freezes well: wrap tightly and freeze up to 3 months. Thaw overnight in the refrigerator before serving.
- High in peanuts and dairy; not suitable for those with those allergies.
My favorite thing about this pie is how people’s faces light up when they bite into the crunchy Butterfinger bits against the pillowy filling. It’s a nostalgic treat that makes any occasion feel celebratory — I still get requests to take this to birthday parties and neighborhood gatherings.
Storage Tips
Store leftover pie covered in the refrigerator for up to 4 days. Use plastic wrap pressed to the surface or an airtight container to prevent the top from picking up odors. For longer storage, freeze the pie wrapped tightly in plastic and a layer of foil — it keeps well for up to 3 months. Thaw in the refrigerator overnight; avoid microwaving frozen slices to defrost as this can make the crust soggy. When serving from chilled, let sit at room temperature 10 minutes for easier slicing.
Ingredient Substitutions
If you don’t have Cool Whip, whip 1 cup (8 ounces) of heavy cream with 2 tablespoons powdered sugar and 1 teaspoon vanilla to soft peaks and fold that in. For a different crust, a graham cracker crust or homemade chocolate crumb crust both work; use a 9-inch crust. To avoid added peanut butter, try an equal amount of cookie butter (Biscoff) for a different but delicious flavor profile. Gluten-free crusts are available for those avoiding gluten, but be sure your Butterfinger pieces are certified gluten-free.
Serving Suggestions
Serve slices chilled with a light drizzle of chocolate sauce or a dollop of freshly whipped cream. Garnish with extra crushed Butterfinger pieces or a few whole fun-sized bars for a dramatic platter. This pie pairs well with strong coffee or an espresso-based drink to cut through the sweetness. For a party, slice small “tasting” portions and plate with fresh berries to balance richness.
Cultural Background
This dessert is a modern American creation celebrating candy-bar flavors and convenience. Inspired by 20th-century no-bake pies that emphasize simple assembly and frozen or chilled settings, the pie reflects a tradition of sweet, American treat-making where pre-packaged candy and shortcut ingredients make entertaining easier. Variations across regions substitute local candies to reflect nostalgic favorites.
Seasonal Adaptations
In summer, keep the pie chilled and serve in a cooler for outdoor events. For autumn, fold in a touch of ground cinnamon (1/2 teaspoon) or swap in seasonal candy bars that contain caramel for a warming twist. During holidays, top with festive sprinkles or crushed peppermint for a seasonal mash-up that still keeps the crunchy texture intact.
Meal Prep Tips
This is an excellent make-ahead dessert: prepare up to two days before you need it and store covered in the fridge. For meal-prep portions, press filling into individual tart shells and chill; these single-serve versions are easy to pack for lunches or desserts on the go. Label frozen pies with date and contents so you can rotate through frozen treats when hosting last-minute guests.
Ultimately, this Butterfinger pie is pure comfort: a simple, joyful dessert that’s reliably impressive. Make it your own with slight swaps and enjoy the smiles it brings.
Pro Tips
Soften cream cheese to room temperature for a lump-free, silky filling.
Fold Cool Whip in gently to keep the filling light and airy; over-mixing will deflate it.
Reserve some crushed candy for the top to maintain an attractive, crunchy finish.
Use a warm knife (run under hot water and dry) for clean slices.
This nourishing cool & creamy butterfinger pie recipe is sure to be a staple in your kitchen. Enjoy every moist, high protein slice — it is perfect for breakfast or as a wholesome snack any time.
FAQs about Recipes
Can I freeze this pie?
Yes — freeze wrapped tightly for up to 3 months. Thaw overnight in the refrigerator before serving.
How long do I need to refrigerate before serving?
Chill at least 4 hours; overnight is best for clean slices and fully-set texture.
Tags
Cool & Creamy Butterfinger Pie
This Cool & Creamy Butterfinger Pie recipe makes perfectly juicy, tender, and flavorful steak every time! Serve with potatoes and a side salad for an unforgettable dinner in under 30 minutes.
Ingredients
Filling
Crust & Topping
Instructions
Soften and combine base ingredients
Bring cream cheese to room temperature. In a large bowl, beat cream cheese with an electric mixer until smooth, add peanut butter and vanilla, and beat until fully combined and glossy.
Sweeten and stabilize
Gradually add powdered sugar while mixing on low to incorporate fully. Beat until the filling is dense and spreadable, tasting and adjusting sweetness if desired.
Fold in candy and Cool Whip
Gently fold in three-quarters of the crushed Butterfinger pieces with a spatula. Fold in thawed Cool Whip in two additions to retain volume and a light texture.
Assemble and chill
Spread the filling into the prepared chocolate crust, sprinkle reserved Butterfinger pieces on top, and refrigerate for at least 4 hours or overnight before slicing.
Last Step: Please leave a rating and comment letting us know how you liked this recipe! This helps our business to thrive and continue providing free, high-quality recipes for you.
Nutrition
Did You Make This?
Leave a comment & rating below or tag
@kitchenfunwithmy3sons on social media!
Categories:
You might also like...
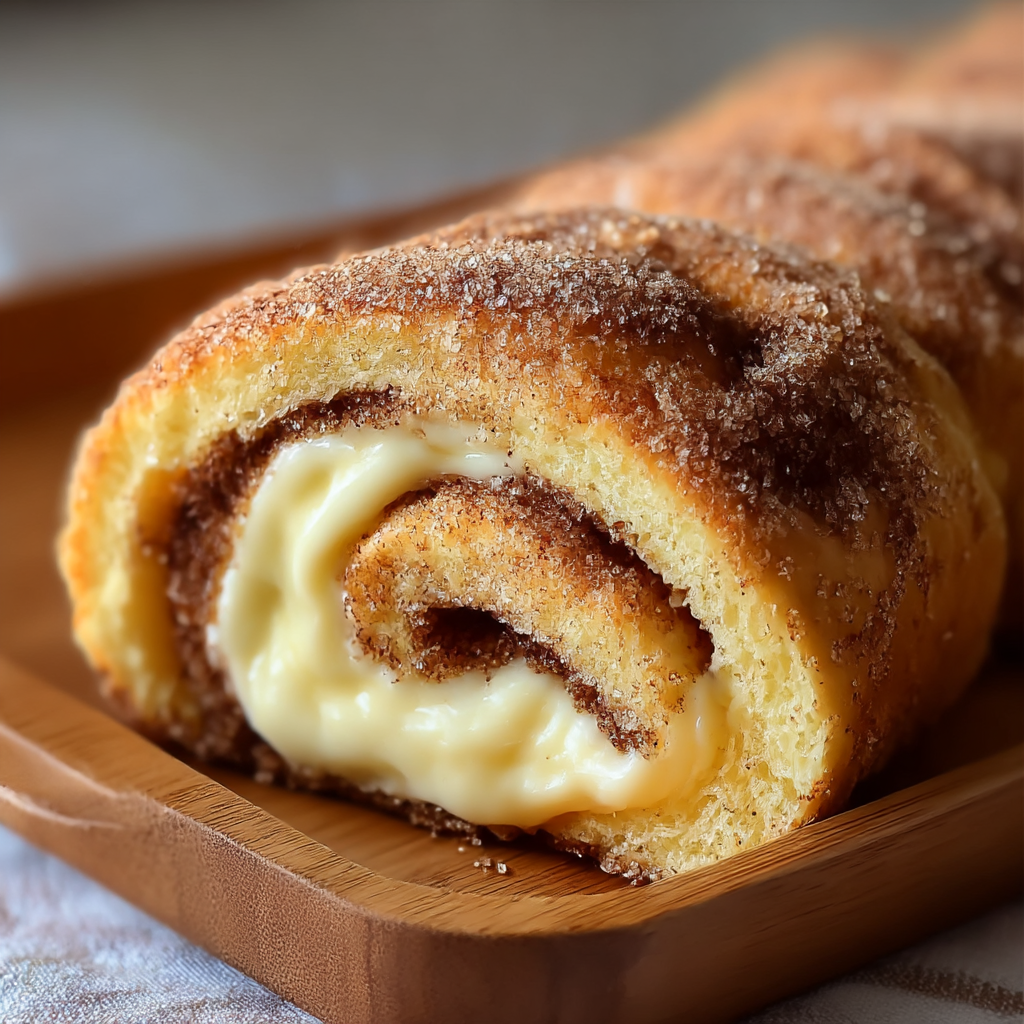
Cinnamon Sugar Cream Cheese Rolls
Buttery pastry envelopes a sweet, creamy cinnamon filling for an irresistible warm dessert or snack—ready in just 30 minutes.

Pineapple Chicken Rice
A bright, one-skillet meal that pairs sweet pineapple with savory chicken and fluffy jasmine rice for an easy, dairy-free weeknight dinner.
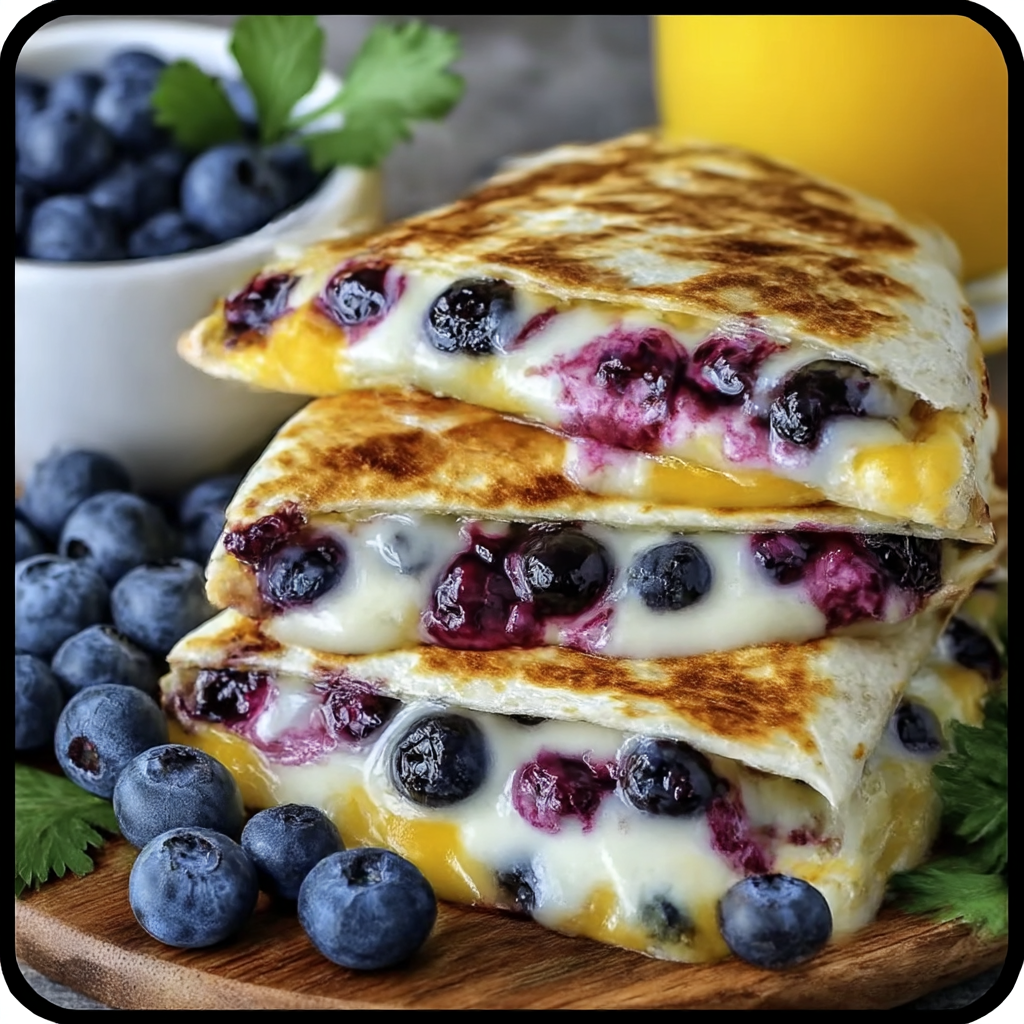
Blueberry Breakfast Quesadilla
Warm tortilla filled with creamy sweetened cream cheese, fresh blueberries and a drizzle of honey—an easy, satisfying morning treat ready in minutes.
Did You Make This?
Leave a comment & rating below or tag @kitchenfunwithmysons on social media!
Rate This Recipe
Share This Recipe
Enjoyed this recipe? Share it with friends and family, and don't forget to leave a review!
Comments (1)
This recipe looks amazing! Can't wait to try it.
Comments are stored locally in your browser. Server comments are displayed alongside your local comments.
Hi, I'm !
What's Popular

Get My 30-Minute Meals email series!
Quick and easy dinner ideas delivered to your inbox.