
Honey Garlic Chicken (SUPER CRISPY!)

A one pan method for irresistibly crispy skin and a sticky honey garlic glaze that will brighten weeknight dinners and please the whole family.
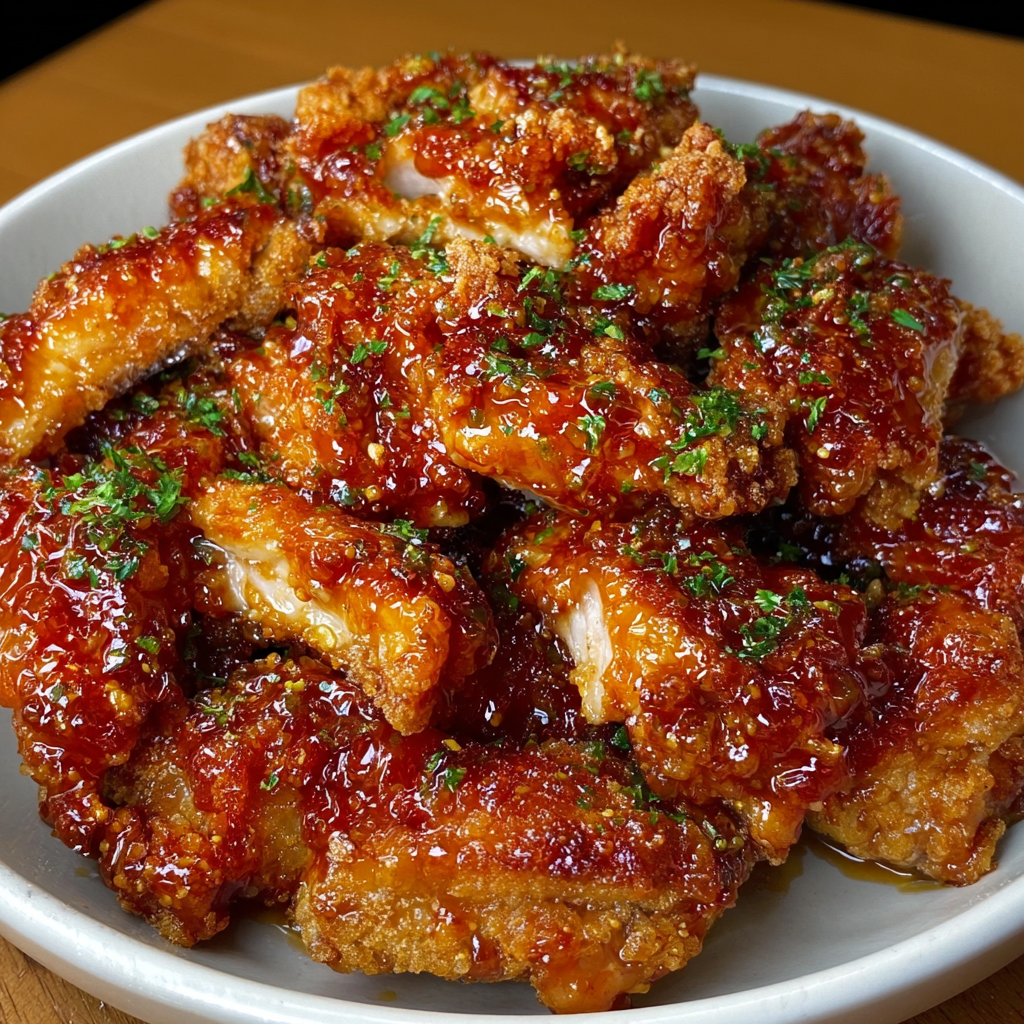
This Honey Garlic Chicken is the recipe I reach for when I want something quick yet impressive. I first developed this method during a hectic week when I needed dinner on the table fast and also wanted the chicken to have that crave worthy crispness. The combination of seasoned cornstarch, hot pan, and skin on thighs transforms ordinary poultry into crisp bites with a tender interior. The glaze is simple yet bold. Fresh garlic, honey, brown sugar, a touch of sambal for warmth, and savory soy sauce come together to make a sticky coating that clings to the skin and meat.
What makes this version special is the balance between texture and flavor. The skin stays super crispy when you sear it right and let it rest on a wire rack while you finish the sauce. Then you can brush or toss the pieces in the glaze depending on whether you want maximum crisp or maximum stick. I discovered this during a family gathering where everyone reached for seconds. It is now a regular request at our table and travels well for potluck style meals.
Why You'll Love This Recipe
- Fast and reliable with a total time of about 20 minutes from pan to plate for four servings, perfect for busy weeknights and last minute guests.
- Uses pantry friendly ingredients such as cornstarch, honey, brown sugar, and soy sauce so you rarely need a special grocery run.
- Skin on thighs give deep flavor and a sturdy surface for a crisp crust while remaining moist inside, which is more forgiving than breast meat.
- Glaze is versatile and can be made milder or hotter by adjusting the sambal. It also doubles as a dipping sauce for rice or steamed vegetables.
- Make ahead friendly because you can sear the chicken and keep it in the fridge, then finish with fresh glaze at serving time for near fresh results.
I still remember the first time I served this to friends who said it tasted like takeout but better. The crisp skin and sticky sweet sauce make it feel indulgent while remaining approachable. The method taught me how important resting on a rack can be for texture. I often make an extra batch just to have leftovers for quick lunches.
Ingredients
- Chicken: 4 pieces boneless skin on chicken thighs. Choose thighs with even thickness and fresh color. Brands such as Tyson or local butcher cut thighs work well. Skin on is essential for the crisp crust and is what gives this dish its signature texture.
- Seasoning: 1/2 teaspoon kosher salt, 1/4 teaspoon black pepper, and 1/2 teaspoon garlic powder. These seasonings are simple but key. Kosher salt seasons more evenly than table salt and garlic powder enhances the savory backbone.
- Dredge: 1/2 cup cornstarch. Use regular cornstarch or potato starch if you prefer. Cornstarch creates a light, crunchy coating that fries quickly without becoming heavy.
- Fat for frying: 3 tablespoons avocado oil. Avocado oil tolerates high heat and has a neutral taste. Vegetable oil can be used as an alternative.
- Easy honey garlic glaze: 10 cloves garlic minced, 2 tablespoons honey, 1/2 tablespoon sambal chili paste or a smaller amount to taste, 2 tablespoons brown sugar packed, 3 tablespoons soy sauce, and 1 tablespoon water. Use a regular soy sauce for traditional flavor or gluten free tamari if you need a gluten free option.
Instructions
Season the meat:Pat the chicken completely dry with paper towels. Season the skin side with 1/2 teaspoon kosher salt and 1/4 teaspoon black pepper. Flip and season the meat side with 1/2 teaspoon kosher salt, 1/4 teaspoon black pepper, and 1/2 teaspoon garlic powder. Dry skin is the first trick to crispness.Prepare the dredge:In a shallow bowl combine 1/2 cup cornstarch with 1/2 teaspoon salt and 1/4 teaspoon black pepper. Press each thigh into the cornstarch mixture and make sure it adheres in a thin even layer. Shake off excess but do not rub it all off. The seasoned dredge adds surface seasoning and helps form the crust.Sear the chicken:Heat a large skillet over medium high heat and add 3 tablespoons avocado oil. When the oil shimmers and is hot but not smoking add the thighs skin side down. Cook for about 3 minutes without moving them to develop color. Flip and cook an additional 3 minutes or until golden brown and crispy. Adjust the heat so the cornstarch does not burn. The internal temperature should reach just under 165 F before resting.Rest on a rack:Transfer the seared thighs to a wire rack set over a sheet tray to drain and preserve crispness. Rest for a few minutes while you make the glaze. Resting helps the juices redistribute and prevents steam from making the skin soggy.Make the glaze:Wipe out excess fat from the skillet leaving a thin film. Over medium high heat add 10 cloves minced garlic, 2 tablespoons honey, 1/2 tablespoon sambal chili paste, 2 tablespoons packed brown sugar, 3 tablespoons soy sauce, and 1 tablespoon water. Stir to combine and bring to a gentle boil. Cook until the sauce bubbles and thickens slightly about 2 to 3 minutes. The sauce will thicken more as it cools.Finish:Add the chicken back to the pan and either toss to coat in the glaze or brush the glaze on if you want to keep the skin extra crisp. Serve immediately over steamed rice or with simple greens.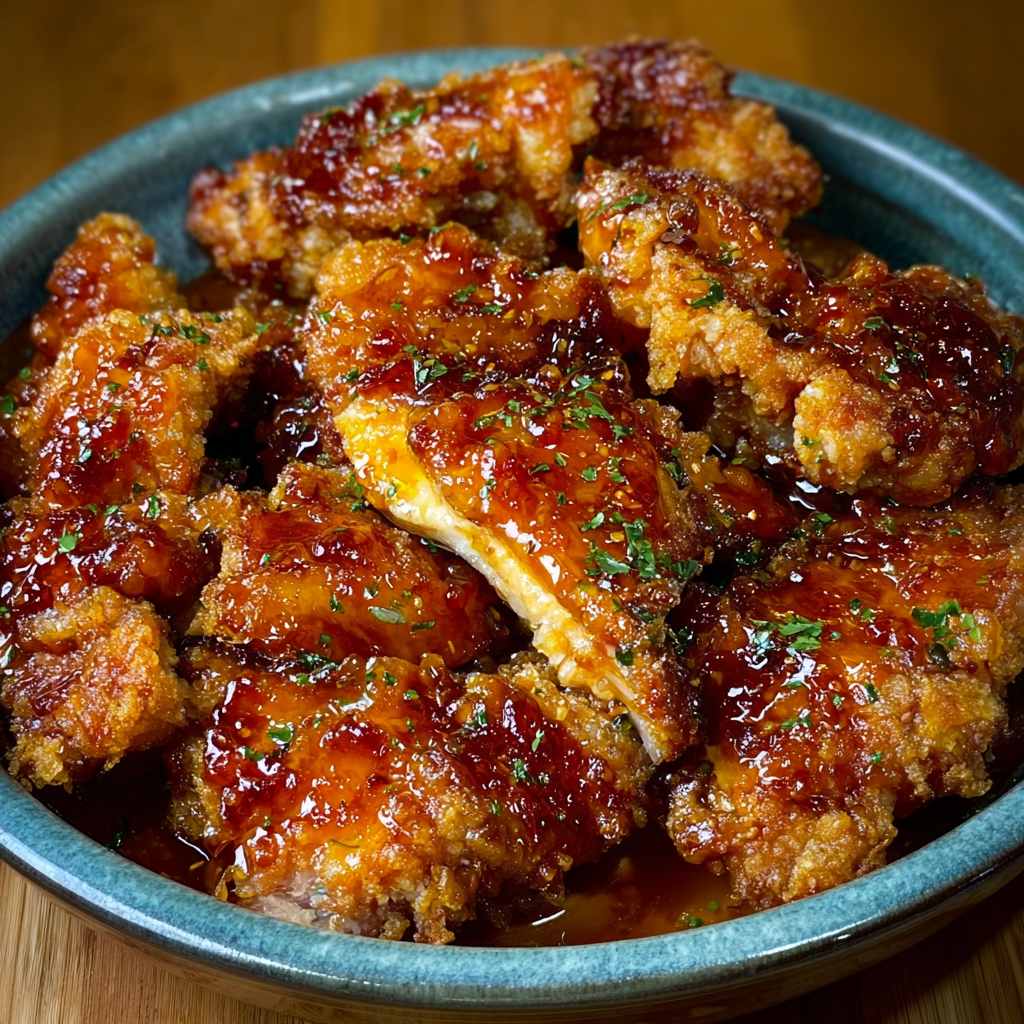
You Must Know
- Monitor oil temperature. For pan searing aim for an oil surface temperature around 325 F to 350 F so the cornstarch crisps and the meat cooks through without burning.
- Rest on a wire rack after searing to drain fat and keep skin crispy even if you sear in batches. A paper towel will make the skin soggy.
- This keeps well in the refrigerator for up to 3 to 4 days. Reheat in an air fryer at 350 F for 6 to 8 minutes or in a 375 F oven for 12 to 15 minutes for best texture.
- If you need a gluten free version use tamari in place of soy sauce and check that your sambal is gluten free.
My favorite part is the moment the glaze hits the warm chicken and you hear that sticky sizzle. Family members will tell you it tastes like takeout but better. When guests comment on the balance of sweet and savory I tell them the secret is equal parts patience while searing and restraint while glazing so the skin shell stays distinct.
Storage Tips
Store leftovers in an airtight container in the refrigerator for three to four days. Place the pieces in a single layer if possible. To re crisp the skin use an air fryer at 350 F for six to eight minutes or an oven set to 375 F for twelve to fifteen minutes. For long term storage wrap cooled pieces tightly and freeze for up to three months. Thaw overnight in the refrigerator and reheat with the same air fryer method to best preserve texture. Avoid reheating in the microwave as this will make the skin soft.
Ingredient Substitutions
If you prefer white meat you can use chicken breasts that are butterflied or pounded to about 1/2 inch thickness for even cooking. For a gluten free option substitute tamari for soy sauce and verify sambal for gluten free labeling. If you want less sugar reduce brown sugar to one tablespoon and honey to one tablespoon. Use potato starch instead of cornstarch for a slightly different crisp. Swap avocado oil for canola or sunflower oil if needed.
Serving Suggestions
Serve over steamed jasmine rice or short grain rice to soak up the glaze. A side of quickly blanched bok choy or a simple cucumber salad with rice vinegar will add a bright contrast. Garnish with sliced scallions and toasted sesame seeds for texture and visual appeal. For a heartier meal pair with fried rice or a chilled noodle salad. This is also excellent sliced and served on top of green salads or in a sandwich with pickled vegetables for lunch.
Cultural Background
This sticky glazed chicken is inspired by classic sweet and savory preparations found across East and Southeast Asia while using a straightforward sear and glaze technique common in home kitchens. The use of soy sauce and garlic nods to Chinese style flavors and the addition of sambal introduces a Southeast Asian hint of heat. The method of crisping skin and then coating with a glossy sauce is similar to preparations you may find in modern comfort food blends.
Seasonal Adaptations
In spring and summer add fresh herbs like basil or mint to the plating and serve with a fresh green papaya salad for brightness. In fall swap jasmine rice for roasted sweet potatoes to add warming sugars that complement the honey. During winter add a splash of rice wine vinegar to the glaze to cut through richness and pair with braised greens to complete a comforting meal.
Meal Prep Tips
You can sear a batch of thighs ahead of time and refrigerate them separately from the glaze. When ready to serve rewarm briefly in a hot pan and finish with freshly made glaze for near freshly cooked texture. Prepping the glaze ingredients in small containers the day before will reduce active time to under five minutes. Pack meals into microwave safe containers for lunches but reheat in an air fryer if you want to restore crispness.
This recipe brings together speed, texture, and flavor in a way that makes weeknight dinners feel special. Give it a try and make it your own by adjusting heat and sweetness to suit your family. The joy of serving something crunchy and saucy at the same time never gets old.
Pro Tips
Pat the chicken skin very dry before seasoning to achieve the best crisp.
Season the cornstarch dredge so the coating carries flavor into every crevice of the chicken.
Rest seared pieces on a wire rack to let fat drain and keep the skin crisp while you finish the glaze.
Remove the chicken from the pan just before it reaches 165 F because carryover heat will finish cooking during rest.
Brush the glaze on for longer crisp or toss to coat for a stickier finish depending on your preference.
This nourishing honey garlic chicken (super crispy!) recipe is sure to be a staple in your kitchen. Enjoy every moist, high protein slice — it is perfect for breakfast or as a wholesome snack any time.
FAQs about Recipes
Can I make this gluten free?
Yes. Use tamari or a labeled gluten free soy sauce and ensure your sambal is gluten free as well. Potato starch can replace cornstarch for the dredge.
How long will leftovers last and how do I reheat them?
Store in an airtight container in the refrigerator for up to four days. Reheat in an air fryer at 350 F for 6 to 8 minutes to restore crispness.
Can I use chicken breasts instead of thighs?
Use boneless skin on thighs for best results. If you must use breasts, butterfly or pound to 1/2 inch thickness and adjust cooking to avoid drying out.
Tags
Honey Garlic Chicken (SUPER CRISPY!)
This Honey Garlic Chicken (SUPER CRISPY!) recipe makes perfectly juicy, tender, and flavorful steak every time! Serve with potatoes and a side salad for an unforgettable dinner in under 30 minutes.
Ingredients
Chicken
Seasoning
Dredge
Frying oil
Easy honey garlic glaze
Instructions
Season the chicken
Pat chicken dry and season skin side with salt and pepper. Flip and season meat side with salt pepper and garlic powder. Dry skin is essential for a crisp crust.
Dredge in seasoned cornstarch
Combine cornstarch with salt and pepper. Press thighs into the mixture so a thin coating adheres. Shake off excess but leave an even layer for best texture.
Pan sear until golden
Heat oil in a skillet over medium high heat. When oil shimmers add thighs skin side down and cook about 3 minutes per side until deep golden brown and crispy. Adjust heat to avoid burning the cornstarch.
Rest on a rack
Transfer seared pieces to a wire rack over a sheet tray to let fat drain and preserve crispness. Rest while you prepare the glaze.
Make the glaze and finish
Wipe excess oil leaving a thin film and add minced garlic honey sambal brown sugar soy sauce and water. Cook over medium high heat until bubbling and slightly thickened then toss or brush chicken to coat.
Last Step: Please leave a rating and comment letting us know how you liked this recipe! This helps our business to thrive and continue providing free, high-quality recipes for you.
Nutrition
Did You Make This?
Leave a comment & rating below or tag
@kitchenfunwithmy3sons on social media!
Categories:
You might also like...

Cinnamon Sugar Cream Cheese Rolls
Buttery pastry envelopes a sweet, creamy cinnamon filling for an irresistible warm dessert or snack—ready in just 30 minutes.
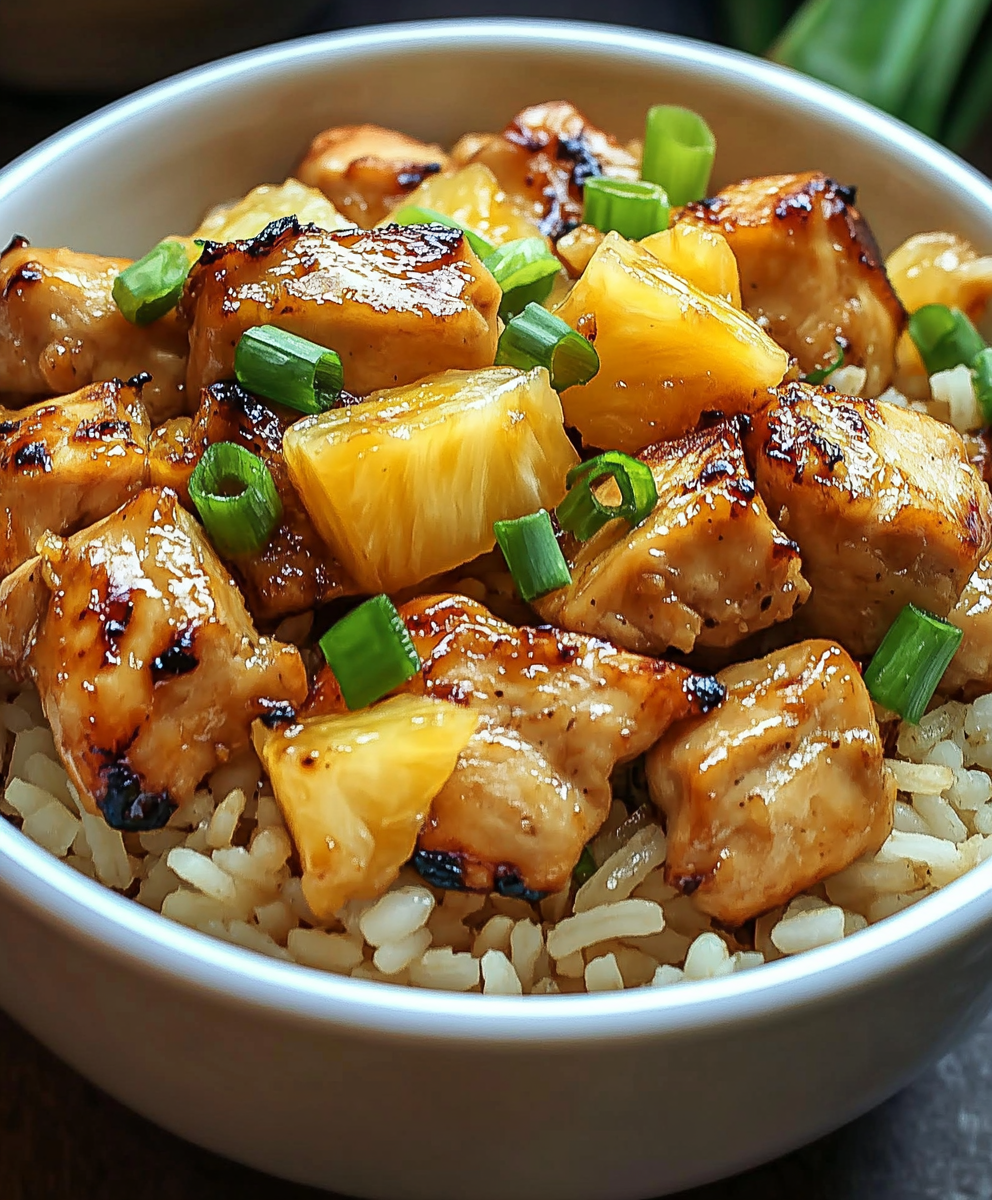
Pineapple Chicken Rice
A bright, one-skillet meal that pairs sweet pineapple with savory chicken and fluffy jasmine rice for an easy, dairy-free weeknight dinner.

Blueberry Breakfast Quesadilla
Warm tortilla filled with creamy sweetened cream cheese, fresh blueberries and a drizzle of honey—an easy, satisfying morning treat ready in minutes.
Did You Make This?
Leave a comment & rating below or tag @kitchenfunwithmysons on social media!
Rate This Recipe
Share This Recipe
Enjoyed this recipe? Share it with friends and family, and don't forget to leave a review!
Comments (1)
This recipe looks amazing! Can't wait to try it.
Comments are stored locally in your browser. Server comments are displayed alongside your local comments.
Hi, I'm !
What's Popular
Get My 30-Minute Meals email series!
Quick and easy dinner ideas delivered to your inbox.